If the printed circuit board (PCB) works in a harsh environment for a long time, then it may not work normally due to various problems. And if the circuit board cannot work normally and efficiently, we need to debug the circuit board at this time so that the circuit board is able to recover normal and work with high efficiency. So which methods does the debugging of the circuit board have?
Debugging Method 1: Measuring circuit board voltage method
This method first requires us to use the instrument to confirm whether the voltage value of each chip power pin on the circuit board is within the normal range, and also need to test the value of the point’s working voltage to see if its value is within the normal range. For instance: Under normal circumstances, when the silicon transistor is conducting, the BE junction voltage is around 0.7V, while the CE junction voltage is around 0.3V or less. If the voltage value of the BE junction of the transistor is found to be greater than 0.7V during the test (except for special transistors, such as Darlington, etc.), it may be that the BE junction is open.
Debugging Method 2: Signal input method of the circuit board
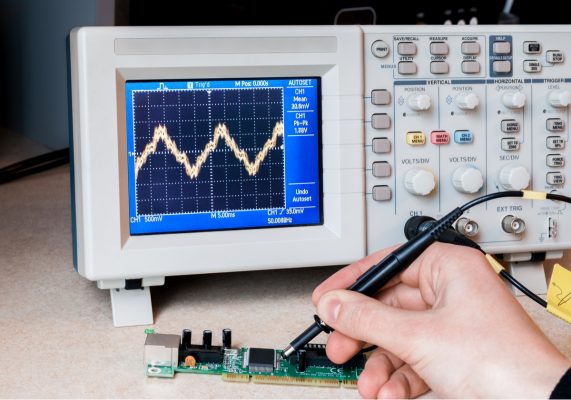
The principle of this method: Add the signal source to the input terminal, and then measure the waveform of each point in turn to see if it is normal to find the fault point. Sometimes we also use simpler methods, such as holding a tweezers with our hands, and touching the input terminals of all levels to see if the output terminal responds. This is often used in amplifying circuits such as audio and video. If there is no response when the previous level is touched, but there is a response when the next level is touched, which means that the problem lies in the previous level and should be checked.


Debugging Method 3: Look, listen, smell, touch
Look: It is by observing that the surface of the circuit board is obviously mechanically damaged, such as deformation, cracking and other related conditions.
Listening: It is to determine the problem by carefully distinguishing the sound of the work of the circuit board and correcting it with the sound of the normal time.
Smell: It is to check whether there is a burnt smell on the circuit board, the smell of capacitor electrolyte, etc. This situation is very sensitive to these smells for an experienced circuit board repairer.
Touch: It means to feel the components of the circuit board by hand. The problem is that they are all within the normal temperature range. Under normal circumstances, the components of the circuit board will heat up after working. If there is no heat It means that the components are not working properly, but they also heat up in places that cannot be hot. It also means that the circuit board is malfunctioning. In general power transistors, voltage regulator chips, etc., it is completely okay to work below 70 degrees. . If this problem is exceeded, there will be problems.
The adjustment of the circuit board need to solve certain instruments for debugging, and it also requires long-term accumulation of experience in circuit board maintenance. Only long-term accumulation can adjust the circuit board in the shortest time and make the circuit board return to normal operation.